One of the best - or worst - things about mountain biking is that it’s a dirty sport. Coming back after a ride covered in filth can be liberating and more often than not, is a telltale sign of a great time on the bike. However, slinging your mucky bike straight into the garage and leaving it for a few days will only degrade your bike and its components. To avoid spending your money on new parts, here’s exactly how to clean your mountain bike.
There are several ways of cleaning your mountain bike from quick car park rinse right through to proper deep cleans where every inch of the bike gets a touch of love. Here, we’ll focus on what to do with your dirty bike from the very moment you get home regardless of whether you’ve got a garden, or you’re washing your bike in the shower. This should also be done even if you’ve given your bike a quick post-ride hose down at the trail centre. Chain Whip Cassette
In the summer, this process can be pared down to a simple rinse with a more irregular chain cleaning cycle, depending on how filthy it gets.
Cleaning your bike is important for several reasons. The most obvious is that it keeps your bike looking great. But there are also performance implications; a clean bike weighs less and will be faster as everything should be clear of resistance-causing dirt. A bike cleaning session also makes for the absolute best time to check over your bike for any damage, wear and tear as a crack can spell the end of your frame, or even cause injury later down the line. And lastly, the post-ride-clean is also an opportunity to lubricate all of the bits that require it.
After your ride, before you start with your bike cleaning, you’ll need to get everything ready to go, including yourself. The UK winters can get pretty cold so have some warm clothing ready before you start the cleaning process and then get blasting with a hose. It’s also wise to leave the shower until after the bike wash because you might get a little dirty while hosing half the forest off it.
You’ll then need to prep your cleaning station with a method of holding your bike upwards. This can mean propping it up with a rear wheel stand, a fully-fledged bike work stand, or simply a wall. The ultimate best option is a proper work stand, which will allow you to get to every inch of your bike easily and if you’re a budding home mechanic, you should have one on hand anyway.
And onto what cleaning products you’ll need. This can vary as cleaners come in different forms but a basic bike cleaning kit should include a mild degreaser, a spray cleaner, a method of cleaning the chain, and two brushes, a large soft one and a slim, more precise detailing brush. One or two clothes or rags will then finish off the job.
While you can reduce this kit down a little further, this is the minimum required for a well-cleaned bike. Alternatively, you can take this one step further and choose after-care products like Muc-Off’s Silicone Shine and Kingud’s Renovate and Protect to protect your bike for your next ride after you've cleaned all the dirt off. Products like this and fancy after-market ceramic coatings will stop mud from sticking, making your next clean even easier.
With everything prepared, grab a hose or a bucket of fresh water and give your bike a spray. This will rehydrate any dried-on mud while removing any excess, leaving you with less to clean manually. Now, you should reach for your spray cleaner and give your bike a good foaming before letting it sit while you move onto the bike’s chain.
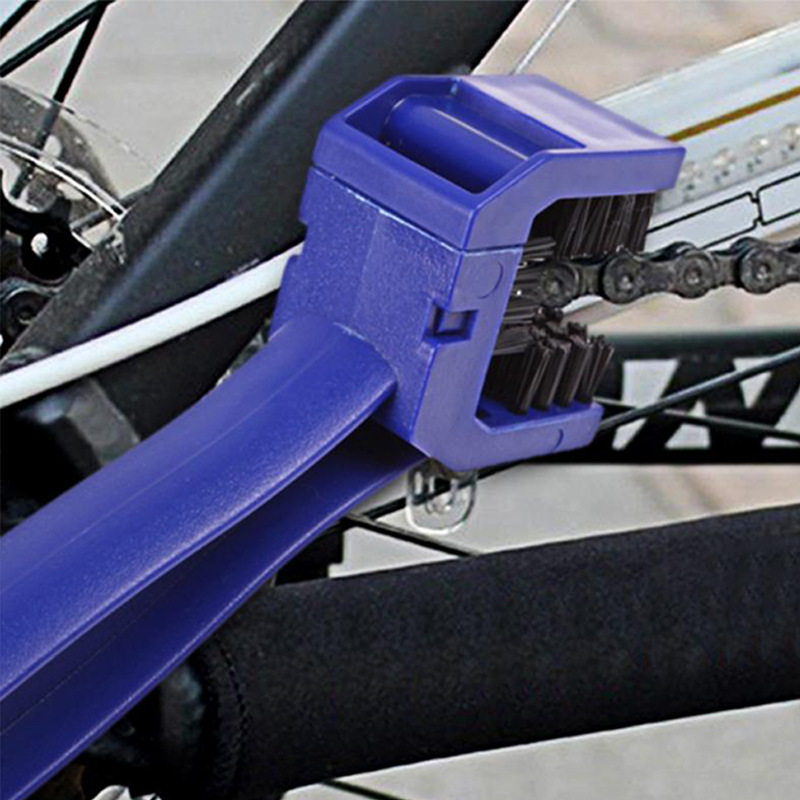
As the cleaner is working its magic it’s time to focus some attention on the chain where you’ll either use a chain cleaning tool, specific brush or pair of toothbrushes and some degreaser to give the chain a once over. Neglecting to clean your chain leads to rust and premature wear, especially in the wetter months, so it’s important to spend a bit of time with this. While you’re here, it’s a great time to scrub your cassette with more degreaser (or the leftovers from your chain cleaner) but don’t rinse the degreaser off just yet.
Investing in a chain cleaning tool is a worthy way to spend a bit of cash as it does a better job of scrubbing your chain faster than anything else and with less mess. Simply drop in a bit of degreaser, clip the cleaner on, and backwards crank the bike. This doesn’t replace a deep clean and degrease but it’ll keep the chain cleaner with less effort.
At this point, the bike might have dried a little bit so it doesn’t hurt to give it another dashing of water. But before your softest brush or sponge hits the bike, give the bristles a good soaking too just to soften them up further and wash away any dirt that was left after your previous wash.
Starting from the top, so that’s the handlebar and saddle, agitate the muck as you work down the bike. Afterwards, give your rims a quick once-over before reaching for the finer brushes in your arsenal. To free mud from your tyres you’ll need a firmer brush and to get in all the nooks and crannies of your linkage, a split brush like the Juice Lubes Double Ender is the weapon of choice. A brush like this also makes light work of wrapping around your bike’s hubs.
Mountain bike suspension has external wiper seals with the purpose of keeping mud from getting in. However, it’s imperative to clear any post-ride mud to maintain the best performance. The best way to do this is to get a clean rag and carefully go around each seal to remove the dirt. Don’t go too hard otherwise, you can damage your stanchion and introduce dirt into the internals of these components.
Thereafter, you can go as far as you like with your cleaning. If you have a work stand, you can take your wheels out and get right into places you wouldn’t usually reach or you can call it done and ready to ride for another day.
Once everything's up to standard, you can rinse your whole bike, while paying special attention to the drivetrain, backwards pedalling as you blast the degreaser away from the chain's links.
All is not completely done, however, as at the very least, you’ll need to bounce the bike to shake off any excess water and wipe the whole thing down with a clean cloth to kick start the drying process. Before relubricating your chain, it will need to be as dry as possible too.
When the bike is nice and clean, it's a great time to check it over for damage and if you’re going for it, any stray bits of dirt that you’ve missed. Finally, if you’re one to add an extra hint of protection, you can apply that to your freshly cleaned bike as per the manufacturer's instructions, using another clean cloth.
Don’t wash your bike with it upside down - Many frames are built with drainage ports around the bottom bracket. Washing your bike will only introduce water into the interior of your frame unnecessarily.
Don’t use dry brushes - Brushes are great for freeing your bike of mud but they do have an abrasive quality. Scrubbing your brush without soaking it beforehand will increase the abrasion that’s possible with even the softest of brushes as there will be dirt present from the previous clean.
Do use a brush and bucket - While a hose makes bike cleaning much easier, there’s nothing wrong with a simple brush and bucket. Some brands offer a bike shampoo that’s designed for the deepest of cleans but can only be applied using a brush and bucket. Just make sure the bucket is clean first.
Don’t use a non-bicycle-specific jet wash - As hardy as they’re designed to be, your bike’s bearings don’t stand a chance against the sheer power of a pressure washer. Yes, it will save time but for the sake of your bike’s longevity, spend the extra time and be gentle.
Do wash your bike as soon as possible - The best opportunity to achieve the most thorough and easy to achieve clean is as soon as you can after your ride when the mud is still damp. Once it has dried on you’ll have more work on your hands as the mud will dry and cling to your bike’s paintwork. Many trail centres have a bike cleaning station where you can get an early rinse in for a small fee, or there are many portable washers on the market that'll do just as good a job. We quite like the Karcher OC3 portable cleaner.
Tech Editor here at off.road.cc Liam can also be found photographing bikes as well as revelling in cycling's intricacies. Whether it's gravel, mountain, or e-MTB as long as it's a bike on dirt, he's happy.
Very good article making the points to be made very clear, I wish I had a washing station or something similar near me!
off-road.cc Editorial and general enquiries: info@off-road.cc Advertising and commercial: sales@off-road.cc
All material © Farrelly Atkinson (F-At) Limited, Unit 7b Green Park Station BA1 1JB. Tel 01225 588855. © 2008–present unless otherwise stated.
Privacy policy and terms and conditions of use.
Mountain bike, bikepacking and gravel bikes. Reviews, buying advice and news. off-road.cc is dedicated to bringing you the best coverage of all off-road riding
Bike Crank Tool Our sister site for road bikes... road.cc Our sister site for e-bikes... ebiketips.co.uk